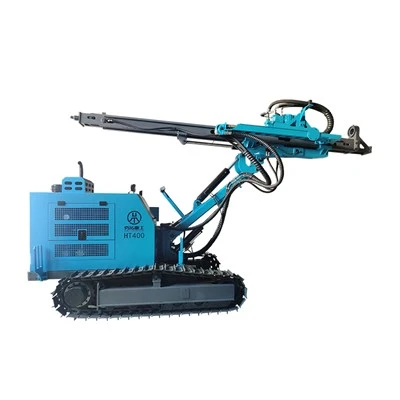
A crawler mounted drill rig is a powerful and versatile piece of equipment widely used in various industries such as mining, construction, and geotechnical engineering. As a crawler mounted drill rig supplier, I understand the importance of a clear and efficient setup process to ensure the optimal performance of the machine. In this blog, I will walk you through the key steps involved in setting up a crawler mounted drill rig.
Step 1: Site Preparation
The first step in setting up a crawler mounted drill rig is to prepare the site. This involves several crucial tasks to ensure a safe and stable working environment.
- Check the Ground Conditions: Before bringing the drill rig to the site, it is essential to assess the ground conditions. The ground should be level, firm, and able to support the weight of the drill rig. Soft or uneven ground can cause instability and potential safety hazards during operation. If necessary, you may need to compact the ground or use leveling pads to create a stable base.
- Clear the Site: Remove any obstacles, debris, or vegetation from the area where the drill rig will be set up. This includes rocks, branches, and other objects that could interfere with the movement of the rig or cause damage to the equipment. A clear site also allows for easy access to the drill hole and reduces the risk of accidents.
- Mark the Drill Hole Location: Use stakes, flags, or other markers to clearly indicate the location of the drill hole. This will help ensure that the drill rig is positioned accurately and that the drilling is carried out in the desired location. Make sure to measure and mark the exact coordinates of the drill hole according to the project specifications.
Step 2: Unloading and Positioning the Drill Rig
Once the site is prepared, it is time to unload and position the crawler mounted drill rig. This step requires careful planning and coordination to ensure the safe and efficient movement of the equipment.

- Use a Suitable Crane or Forklift: To unload the drill rig from the transport vehicle, use a crane or forklift with sufficient lifting capacity. Make sure the lifting equipment is in good working condition and that the operator is trained and experienced. Follow all safety procedures and guidelines when lifting and moving the drill rig.
- Position the Drill Rig: Carefully maneuver the drill rig into position over the marked drill hole. Use the crawler tracks to move the rig into place, making sure to align it accurately with the drill hole. Check the levelness of the rig using a spirit level or other leveling device and adjust the hydraulic outriggers if necessary to ensure a stable and level platform.
- Secure the Drill Rig: Once the drill rig is in position, secure it to the ground using the hydraulic outriggers or other stabilizing devices. This will prevent the rig from moving or tipping over during operation. Make sure all the outriggers are fully extended and locked in place, and that the rig is firmly supported on the ground.
Step 3: Connecting the Hydraulic and Electrical Systems
After the drill rig is positioned and secured, the next step is to connect the hydraulic and electrical systems. These systems are essential for the operation of the drill rig and must be properly connected to ensure its safe and efficient performance.
- Hydraulic System: Connect the hydraulic hoses from the drill rig to the hydraulic power unit. Make sure the connections are tight and secure, and that there are no leaks. Check the hydraulic fluid level and add more fluid if necessary. Start the hydraulic power unit and check the pressure and flow of the hydraulic system to ensure it is operating properly.
- Electrical System: Connect the electrical cables from the drill rig to the power source. Make sure the connections are tight and secure, and that there are no exposed wires or loose connections. Check the voltage and amperage of the electrical system to ensure it is compatible with the drill rig. Start the electrical system and check the operation of the lights, motors, and other electrical components.
Step 4: Installing the Drill Rods and Bits
With the hydraulic and electrical systems connected, the next step is to install the drill rods and bits. The drill rods and bits are the tools used to penetrate the ground and extract samples or create boreholes.
- Select the Appropriate Drill Rods and Bits: Choose the drill rods and bits based on the type of soil or rock you will be drilling through and the specific requirements of the project. Make sure the drill rods and bits are in good condition and that they are compatible with the drill rig.
- Install the Drill Rods: Start by inserting the first drill rod into the drill head. Use a wrench or other tool to tighten the connection between the drill rod and the drill head. Once the first drill rod is installed, add additional drill rods as needed, using the same process to connect them together. Make sure the drill rods are aligned properly and that there are no gaps or misalignments between the joints.
- Install the Drill Bit: Attach the drill bit to the end of the drill rod using a suitable connection method. Make sure the drill bit is securely attached and that it is centered properly on the drill rod. Check the condition of the drill bit and replace it if it is worn or damaged.
Step 5: Testing and Calibration
Before starting the drilling operation, it is important to test and calibrate the drill rig to ensure it is operating properly and that the drilling parameters are set correctly.
- Function Test: Perform a function test of the drill rig to check the operation of all the components and systems. This includes testing the hydraulic system, electrical system, drill head, rotation system, and feed system. Make sure all the controls are working properly and that there are no abnormal noises or vibrations.
- Calibration: Calibrate the drill rig to ensure the drilling parameters such as the rotation speed, feed rate, and torque are set correctly. This will help optimize the drilling performance and ensure accurate and consistent results. Use the manufacturer's guidelines and specifications to calibrate the drill rig.
- Check the Drill Rods and Bits: Inspect the drill rods and bits again to make sure they are properly installed and in good condition. Check the alignment of the drill rods and the centering of the drill bit. Make any necessary adjustments or replacements before starting the drilling operation.
Step 6: Commencing the Drilling Operation
Once the drill rig is set up, tested, and calibrated, it is ready to start the drilling operation. Follow these steps to ensure a safe and efficient drilling process.
- Set the Initial Drilling Parameters: Based on the type of soil or rock and the project requirements, set the initial drilling parameters such as the rotation speed, feed rate, and torque. Monitor the drilling process closely and make adjustments as needed to optimize the performance and ensure accurate results.
- Start the Drilling: Slowly start the drill rig and begin the drilling process. Apply a steady and controlled pressure to the drill head to ensure smooth and consistent penetration of the ground. Monitor the drilling progress and the condition of the drill rods and bits. If you encounter any problems or abnormalities, stop the drilling immediately and investigate the cause.
- Collect Samples or Boreholes: As the drilling progresses, collect samples of the soil or rock for analysis or create boreholes for further testing or construction purposes. Use the appropriate sampling or borehole techniques and equipment to ensure the accuracy and reliability of the results.
- Monitor and Maintain the Drill Rig: Throughout the drilling operation, monitor the performance of the drill rig and the condition of the components and systems. Check the hydraulic fluid level, the electrical connections, and the wear and tear of the drill rods and bits. Perform regular maintenance and lubrication to ensure the continued operation and longevity of the drill rig.
Conclusion
Setting up a crawler mounted drill rig is a complex and important process that requires careful planning, preparation, and execution. By following the steps outlined in this blog, you can ensure a safe and efficient setup process and optimize the performance of the drill rig. As a crawler mounted drill rig supplier, we are committed to providing high-quality equipment and excellent customer service. If you have any questions or need further information about our products or the setup process, please do not hesitate to [contact us] for a detailed discussion and to explore how our crawler mounted drill rigs can meet your specific needs.
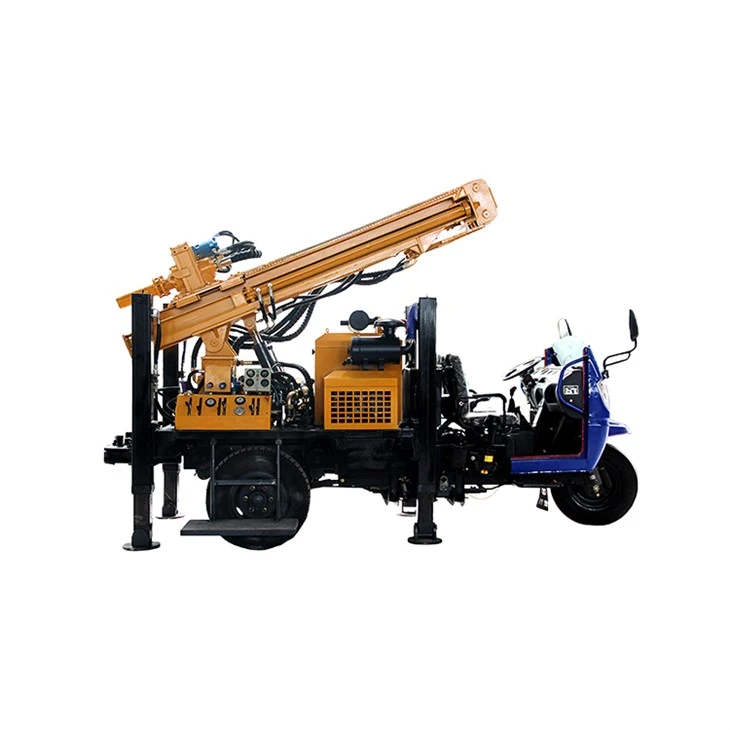
We also offer a range of other drilling rigs, including Truck-mounted Water Well Drilling Rig, Small Tricycle Vehicle-mounted Water Well drilling Rig, and Trailers Type Water Well Drilling Rig. Each of these rigs has its own unique features and advantages, designed to meet different drilling requirements and project specifications.
References
- Manufacturer's manuals and technical specifications for crawler mounted drill rigs.
- Industry standards and best practices for drilling operations.