Installing a pneumatic rock drilling rig is a crucial process that requires careful planning, proper tools, and a clear understanding of safety protocols. As a reputable pneumatic rock drilling rig supplier, we are committed to providing high - quality equipment and comprehensive guidance to ensure a successful installation. In this blog, we will walk you through the step - by - step process of installing a pneumatic rock drilling rig.
Pre - installation Preparations
Site Inspection
Before beginning the installation, a thorough site inspection is necessary. Evaluate the terrain where the rig will be installed. The ground should be flat, stable, and capable of supporting the weight of the drilling rig. Uneven or soft ground can lead to instability during operation, which is extremely dangerous. Check for any underground utilities such as water pipes, gas lines, or electrical cables. Mark their locations clearly to avoid accidental damage during the installation process.
Equipment and Tools Check
As a pneumatic rock drilling rig supplier, we ensure that all the components of the rig are in good condition before delivery. However, it is still essential for you to conduct a final check upon arrival. Inspect the main body of the rig, air hoses, drill bits, and other accessories for any visible damage or defects. Gather all the necessary tools for installation, including wrenches, screwdrivers, and measuring instruments. Make sure you have the installation manual provided by us, as it contains detailed instructions and specifications for your specific model.
Safety Precautions
Safety should always be the top priority. Provide all the installation personnel with appropriate personal protective equipment (PPE), such as hard hats, safety glasses, ear protection, and steel - toed boots. Establish a safety perimeter around the installation site to prevent unauthorized access. Ensure that all workers are trained in basic safety procedures and are aware of potential hazards associated with the installation process.
Installation Steps
Assembly of the Rig
- Base Installation: Start by assembling the base of the pneumatic rock drilling rig. Place the base on the prepared site and use a level to ensure it is perfectly horizontal. Secure the base to the ground using anchor bolts if required. This step is crucial as a stable base is the foundation for the entire rig.
- Mounting the Main Body: Carefully lift the main body of the rig and place it on the base. Align the mounting holes on the main body with those on the base. Insert the bolts and tighten them using the appropriate wrenches. Make sure the main body is firmly attached to the base to prevent any movement during operation.
- Connecting the Air Supply: Connect the air hoses from the air compressor to the rig. Use high - quality air fittings and ensure they are tightly secured to prevent air leakage. Check the air pressure rating of the hoses and make sure they are compatible with the air compressor and the rig. A proper air supply is essential for the efficient operation of the pneumatic rock drilling rig.
Installation of Drill Rods and Bits
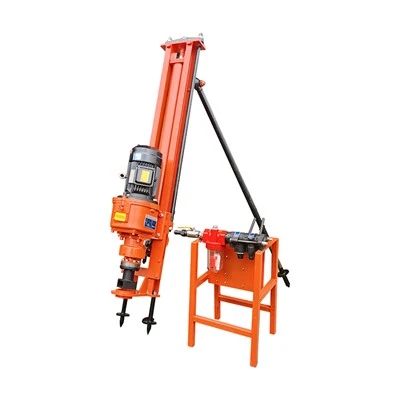
- Selecting the Right Drill Rods and Bits: Choose the drill rods and bits based on the type of rock you will be drilling and the depth of the hole. As a pneumatic rock drilling rig supplier, we offer a wide range of drill rods and bits to meet different requirements. For example, for softer rocks, you may use a pneumatic air leg rock drill, while for harder rocks, a more robust drill bit may be needed.
- Attaching the Drill Rods: Insert the drill rods into the chuck of the rig. Make sure they are properly aligned and tightened. If you need to use multiple drill rods, connect them together using the appropriate couplings. Ensure that the connections are secure to prevent the drill rods from coming loose during drilling.
- Installing the Drill Bit: Attach the drill bit to the end of the drill rod. Tighten it firmly to ensure a stable connection. The drill bit is the cutting tool of the rig, and its proper installation is crucial for efficient drilling.
Electrical and Control System Installation (if applicable)
Some pneumatic rock drilling rigs may have electrical components or control systems. If your rig falls into this category, follow the instructions in the installation manual to install the electrical wiring and control panels. Make sure all electrical connections are properly insulated and grounded to prevent electrical hazards. Test the control system to ensure that all functions are working correctly.
Post - installation Checks
Function Testing
After the installation is complete, conduct a thorough function test of the pneumatic rock drilling rig. Start the air compressor and check the air pressure at the rig. Make sure the air pressure is within the recommended range. Operate the rig at a low speed to test the movement of the drill rods and the rotation of the drill bit. Check for any abnormal noises or vibrations during the test. If you notice any issues, stop the rig immediately and troubleshoot the problem.
Leakage Inspection
Inspect all the air hoses, fittings, and connections for air leakage. You can use a soapy water solution to check for leaks. Apply the solution to the connections, and if there are bubbles, it indicates an air leak. Tighten the fittings or replace any damaged components as necessary.
Safety System Check
Verify that all the safety systems of the rig are working properly. This includes emergency stop buttons, safety guards, and pressure relief valves. Test the emergency stop button to ensure that it can immediately stop the operation of the rig in case of an emergency.
Maintenance and Troubleshooting Tips
Regular Maintenance
To ensure the long - term performance of your pneumatic rock drilling rig, regular maintenance is essential. Clean the rig after each use to remove dirt and debris. Lubricate the moving parts according to the manufacturer's recommendations. Check the air filters regularly and replace them when they are dirty. Inspect the drill bits and rods for wear and replace them as needed.
Troubleshooting
If you encounter problems with the rig, refer to the troubleshooting section of the installation manual. Common issues include low air pressure, drill bit jamming, and abnormal vibrations. For example, if the air pressure is low, check for air leaks in the hoses or a malfunctioning air compressor. If the drill bit is jammed, stop the rig and carefully remove the drill bit to clear any obstructions.
Conclusion
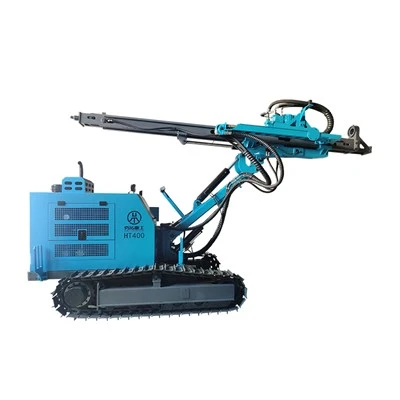
Installing a pneumatic rock drilling rig is a complex but manageable process. By following the steps outlined in this blog and adhering to safety protocols, you can ensure a successful installation. As a leading pneumatic rock drilling rig supplier, we are always ready to provide you with the support and guidance you need. Whether you are looking for a mini pneumatic drill for small - scale projects or an Integrated Open - pit Down - the - hole Drill Rig for large - scale mining operations, we have the right equipment for you.


If you are interested in purchasing a pneumatic rock drilling rig or need further assistance with installation, please feel free to contact us. Our professional sales team is eager to discuss your requirements and provide you with the best solutions.
References
- Manufacturer's installation manual for pneumatic rock drilling rigs
- Industry standards and guidelines for rock drilling equipment installation