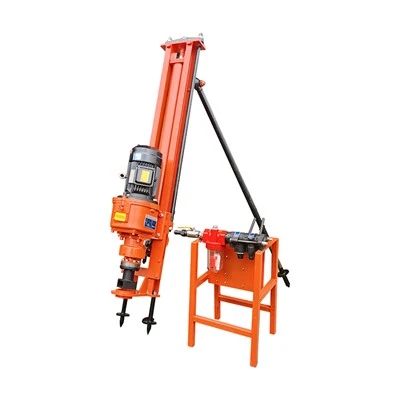
Installing a hand-held rock drill on a stand is a crucial process that enhances the efficiency, stability, and safety of rock drilling operations. As a reputable hand-held rock drill supplier, I understand the importance of providing clear guidance on this installation process. In this blog post, I will walk you through the step-by-step procedure of installing a hand-held rock drill on a stand, ensuring that you can carry out your drilling tasks with confidence.
Step 1: Gather the Necessary Tools and Equipment
Before you begin the installation process, it is essential to gather all the tools and equipment you will need. This includes the hand-held rock drill, the stand, a wrench, a drill bit, safety goggles, gloves, and any other accessories recommended by the manufacturer. Having everything ready beforehand will save you time and ensure a smooth installation process.
Step 2: Choose the Right Stand
Selecting the appropriate stand for your hand-held rock drill is crucial. The stand should be sturdy, stable, and compatible with the drill's specifications. Consider the weight, size, and type of the drill when choosing a stand. Additionally, ensure that the stand has adjustable legs or a base that can be leveled to provide a stable platform for the drill.
Step 3: Prepare the Stand
Once you have chosen the right stand, it's time to prepare it for installation. Start by assembling the stand according to the manufacturer's instructions. This may involve attaching the legs, adjusting the height, and securing any loose parts. Make sure the stand is fully assembled and stable before proceeding to the next step.
Step 4: Mount the Drill on the Stand
Now that the stand is ready, it's time to mount the hand-held rock drill on it. Begin by positioning the drill on the stand's platform or mounting bracket. Align the drill's mounting holes with the holes on the stand and insert the bolts or screws provided. Use a wrench to tighten the bolts or screws securely, ensuring that the drill is firmly attached to the stand.
Step 5: Connect the Air or Hydraulic Lines
If your hand-held rock drill is powered by air or hydraulics, you will need to connect the appropriate lines to the drill and the stand. Follow the manufacturer's instructions carefully to ensure that the lines are connected correctly and securely. Make sure there are no leaks or loose connections that could affect the drill's performance.
Step 6: Check the Alignment and Adjustment
After mounting the drill on the stand and connecting the lines, it's important to check the alignment and adjustment of the drill. Ensure that the drill is centered on the stand and that the drill bit is perpendicular to the surface you will be drilling. Use the stand's adjustable features, such as the height and angle adjustments, to fine-tune the drill's position and alignment.
Step 7: Test the Drill
Before starting any drilling operations, it's crucial to test the drill to ensure that it is functioning properly. Turn on the power source and activate the drill. Check for any unusual noises, vibrations, or leaks. Test the drill's speed, torque, and other functions to ensure that they are working as expected. If you notice any issues, stop the drill immediately and consult the manufacturer's troubleshooting guide or contact our technical support team.
Step 8: Safety Precautions
When using a hand-held rock drill on a stand, it's important to follow all safety precautions to prevent accidents and injuries. Wear appropriate safety gear, such as safety goggles, gloves, and ear protection. Keep your hands and fingers away from the drill bit and other moving parts. Avoid overloading the drill or using it in hazardous conditions. Additionally, make sure the stand is stable and secure before starting any drilling operations.


Step 9: Maintenance and Care
To ensure the longevity and performance of your hand-held rock drill and stand, it's important to perform regular maintenance and care. Follow the manufacturer's recommended maintenance schedule, which may include lubricating the drill, checking the air or hydraulic lines for leaks, and inspecting the stand for any signs of wear or damage. Keep the drill and stand clean and dry when not in use, and store them in a safe and secure location.
Conclusion
Installing a hand-held rock drill on a stand is a relatively straightforward process that can significantly enhance the efficiency and safety of your rock drilling operations. By following the steps outlined in this blog post and using the right tools and equipment, you can ensure that your drill is properly installed and ready to use. Remember to always follow the manufacturer's instructions and safety precautions when using a hand-held rock drill on a stand.
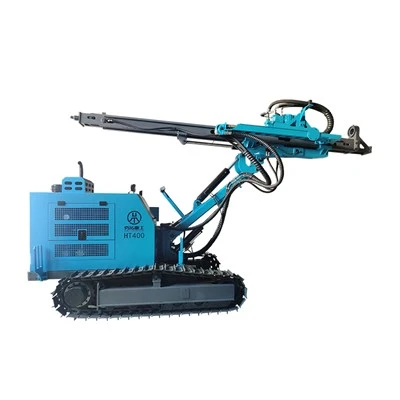
If you have any questions or need further assistance with installing a hand-held rock drill on a stand, or if you are interested in purchasing a high-quality hand-held rock drill or related equipment, please do not hesitate to contact us. We are a leading hand held rock drill supplier offering a wide range of products, including Integrated Open-pit Down-the-hole Drill Rig, pneumatic air leg rock drill, and mini pneumatic drill. Our team of experts is here to help you find the right solution for your specific needs and provide you with professional advice and support.
References
- Manufacturer's instructions for the hand-held rock drill and stand
- Industry standards and best practices for rock drilling equipment installation and operation